In the Spotlight: Lighting Tudor Corner
When the beautiful new LEGO Tudor Corner (and GWP Corner Kiosk) set was announced, I could tell that it would become a central display piece in many people’s LEGO modular collections. I could also tell this would be a perfect opportunity to demonstrate how anyone can come up with their own custom lighting solution, especially when set-specific lighting kits do not yet exist. And when LEGO generously offered BrickNerd the Tudor Corner and accompanying GWP Corner Kiosk sets, I knew what I had to do… call dibs! 😋
Looking through past BrickNerd articles on the custom lighting of LEGO, we have certainly covered quite a few topics: reasons for adding lighting to your LEGO MOCs, pioneers of custom lighting solutions, set-specific lighting kits, using miscellaneous lights that you may have on hand, and even advanced DIY techniques for soldering and programming your own lights. What we have not focused on, however, is practical lighting techniques that use LEGO lighting fixtures to direct that light exactly where and how you need it most.
In this article, I am going to share my experience with using the standard “pico lights” from Brickstuff to light my builds. I will share examples of lighting fixtures that you can build to house the LEDs, some lessons learned, and demonstrate how they can all be applied to lighting the new Tudor Corner modular set - lucky me!
Let There Be Lighting
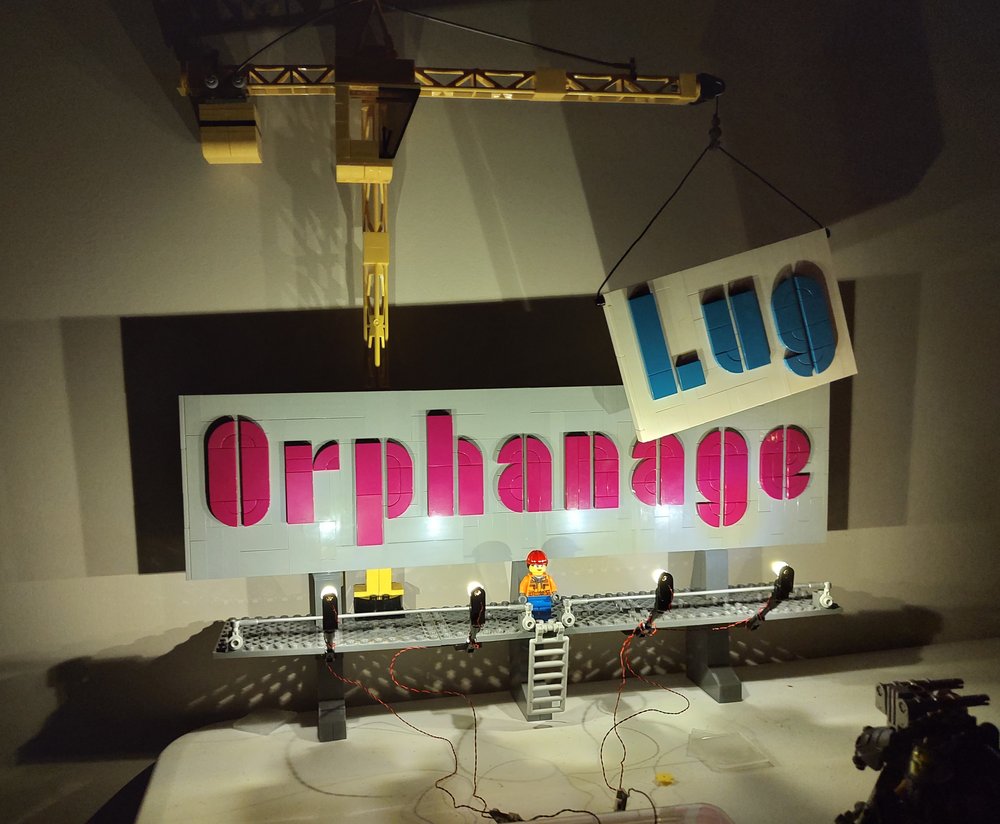
My first foray into using custom LEGO lighting was for a collaboration project called the “OrphanLUG Orphanage” at Brickworld 2022. The basic concept for the orphanage was a large, stackable modular building of 16x16 sigfig habitats, with the added requirement that each room be lighted. In addition, I also built some of the additional building infrastructure; a boiler room, cafeteria, and a large billboard sign over the orphanage utilizing Kristel Whitaker’s popular font.


As this would be my first time adding lights into any of my builds, I chose to purchase the Brickstuff lighting system. They had starter-kits available with everything that I would need to… well, get started. Their starter-kit at that time included pico lights, connector boards, and a battery pack power supply (Note: Brickstuff is currently revamping their product line, and anticipate bringing back starter kits in the very near future). As Brickstuff also attends Brickworld as a vendor, we also had the peace of mind that if we had an issue lighting our collab that they would be there to support us.
Below are a photos of how the Orphanage billboard and boiler room looked after adding the lights:

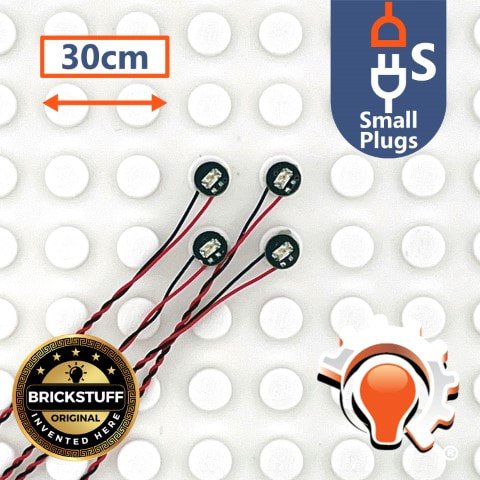
But what are these pico lights I keep mentioning, and what makes them so versatile? Well, pico lights are very small LED lights. So small that their LED board can fit within a 1x1 round LEGO plate. The wire connector at the other end is also small enough to route through technic pin holes and bar holes. When you need to install lighting in really tight spaces, like within many LEGO builds, the pico lights that Brickstuff developed are a great solution.
Gleaming the Cubes
The next Brickworld collaboration that I was involved with that required lighting was the New Hashima cyberpunk city in 2023. It was here that I really honed my techniques with leveraging pico lights in various ways to light my cubes and tower. Below are a couple of the key considerations I discovered, and the helpful techniques that I used to address them.
View fullsize
View fullsize

View fullsize

Light Direction
To help better direct light where I needed it, I used this fixture assembly that I have illustrated below. It was first put to use with my Orphanage billboard, where I needed to place the light source well in front of the surface and then direct the light back at a sign. To do this I used:
a 1x1 round with bar attachment,
bar/clip connectors,
and a bar.
This part combination gives you the ability to hinge and rotate the light in a lot of different directions, which makes it easy to adjust it as needed. I later used this to direct the lights towards the signs of my convenience store cube, as well as all of the various billboards of my tower.
View fullsize
View fullsize

Spotlights vs. Spread-lights
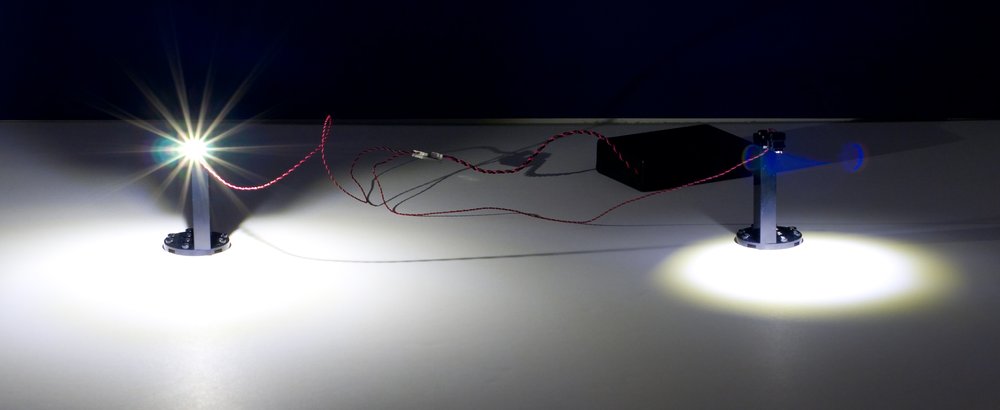
In the example of the OrphanLUG billboard, you can see that the light is spread quite broadly when using a 1x1 transparent round plate over the LEDs… and that it also shines into the viewers’ eyes. Ugh, light pollution! To solve for this problem, I tried shining the LED through a 1x1 opaque round plate w/hole. There are two benefits to this vs. the transparent plate: 1) the light is directed as a narrower spotlight, and 2) it acts as a light shield so that the viewer isn’t getting blinded by the lights. Below is a side-by-side comparison. Again, they are the same exact pico lights, just shined through two different parts.
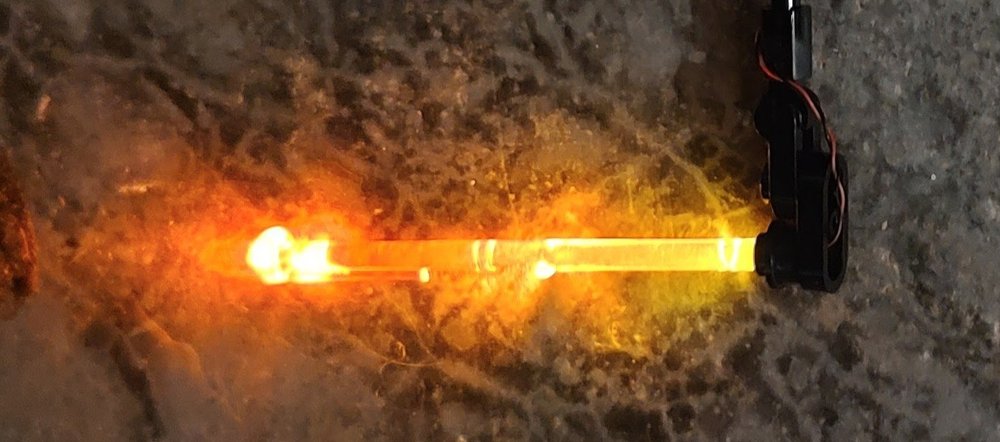
One other benefit to using the 1x1 round plate w/hole is that it is good to help direct light into a light pipe. The best materials for light pipes are either optical acrylic or polycarbonate. LEGO has typically used polycarbonate in their transparent bars, so most will light up fairly well (like light sabers). Below is an example with using one of the longer flick-fire missiles as a light pipe.
Light Color
I generally prefer the “warm white” pico lights, that have the more yellowish glow found in traditional incandescent lightbulbs. I found that I could shine them through most transparent LEGO colors and achieve the colored lighting I was after.
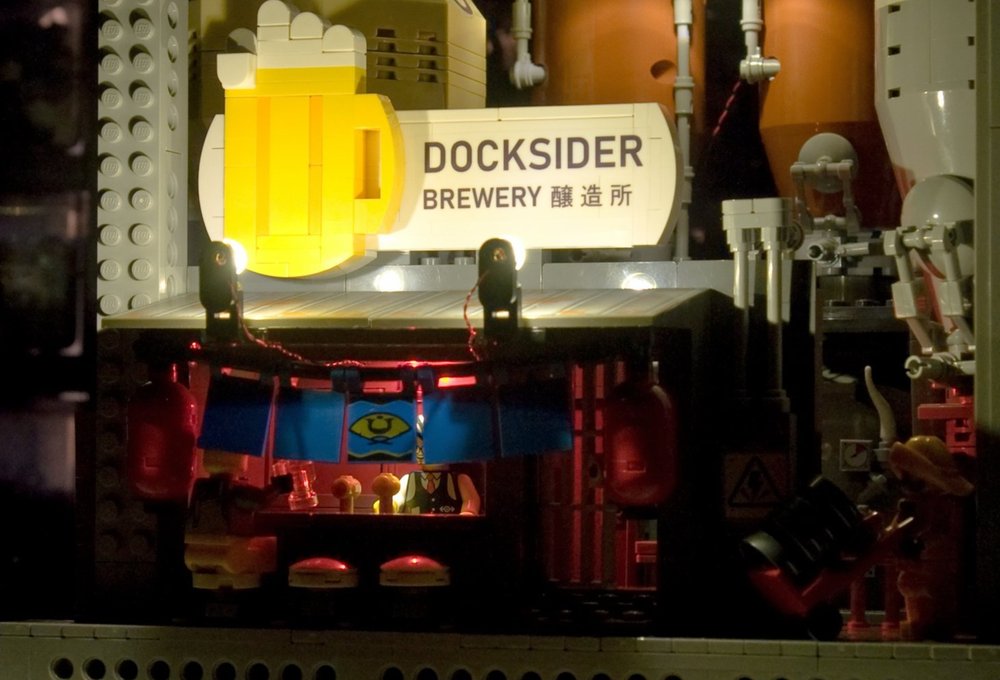
One example is within my Docksider Brewery cube, and the lighting of the dockside bar interior. I used a 1x1 round brick in transparent red placed around the pico light. The direct light through the center of the part lit the bartender with white light, while the area surrounding him was in red. With this solution, it was like having two lights in one!
You can now see how all of these learnings and techniques “stacked up” on my completed New Hashima cube tower stack. Here is the WIP picture that I took prior to taking everything apart for transport, and one of it placed in the completed layout.
View fullsize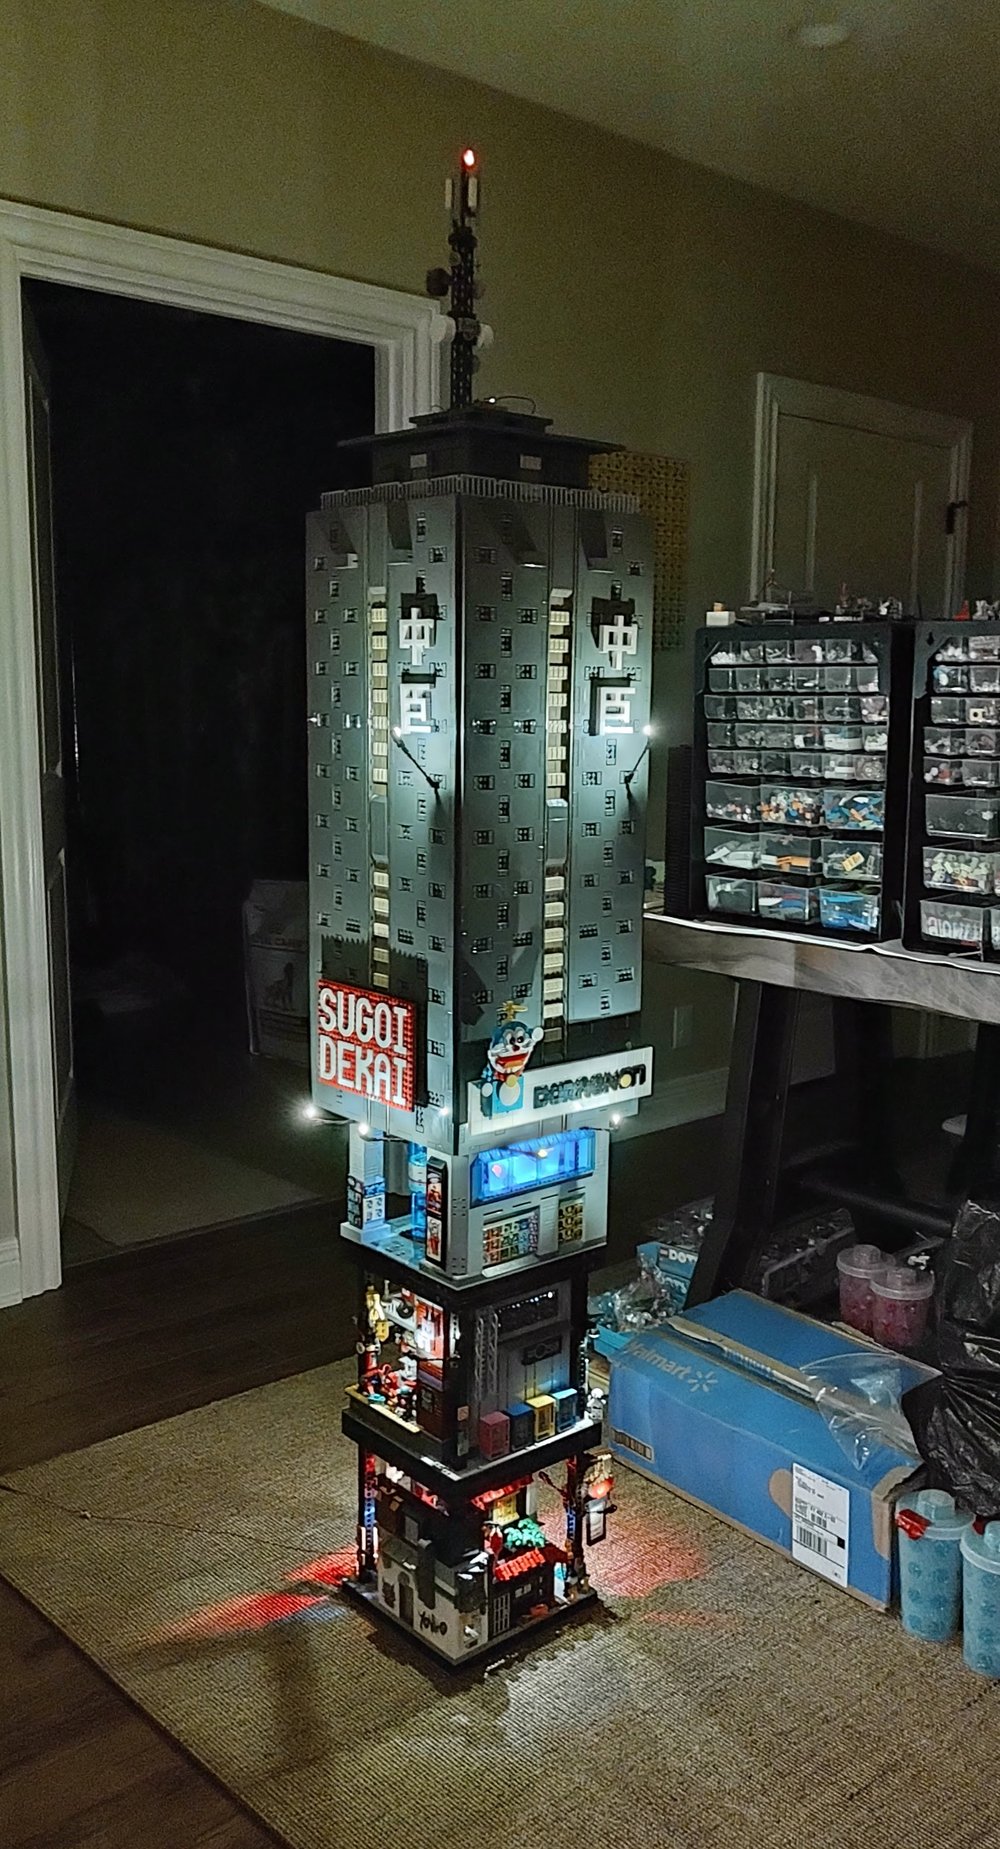
View fullsize

Final Exam: Lighting Tudor Corner
Now that we have reviewed some key lighting fixture techniques, it is finally time to apply what we have learned to the Tudor Corner… after we build it, that is.
As a confessed MOC builder who distains building sets before sorting the parts to use them for something else, seeing the 20 numbered part envelopes did give me pause. However, unlike the technic pin torture of the last set I looked at for BrickNerd, I would soon discover that the Tudor Corner would be an absolute joy to build (as well as the GWP Corner Kiosk).
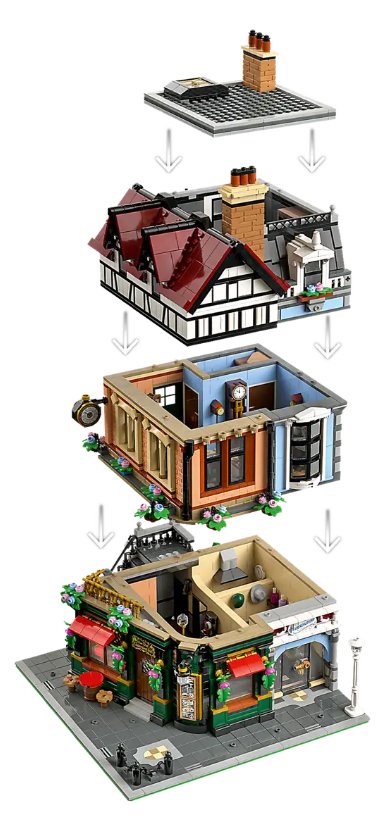
I will avoid revealing spoilers, but I will say there are plenty of fun and clever techniques being used, and loads of thoughtful details throughout. It really felt like the set designers were seemingly freed of their usual constraints and were able to flex their skills. There were points during the build where I was thinking, "Oh, c’mon. Now they are just showing off!" I was a bit awe-struck while building this set, and as a seasoned MOC builder, that is not something I say lightly.
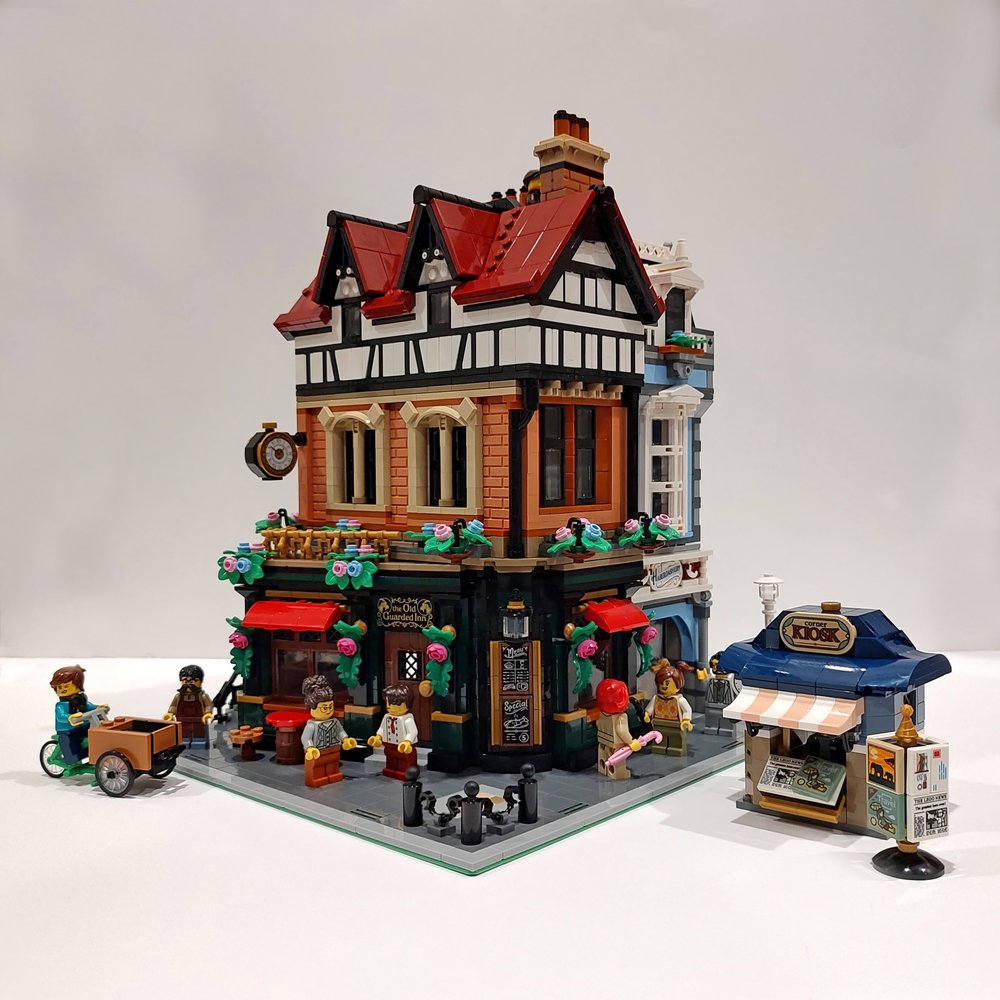
That said, there were still a few minor part changes and color swaps I decided to make. You will see that I changed the bay window frames above the haberdashery from black to white, as well as the surrounding cheese slopes, and metal railing trim at the top of its roofline. Those frames and railings have been commonly available in white on the LEGO Store Pick-a-Brick walls, so there is a good chance you also have them yourselves. I wondered about their color choice of black frames when most of the other trim in that building was in white, but I did appreciate adding those colors into my part collection, and perhaps that was always the designers’ intent.
Lights, Modular, ACTION!
With the set finally built, it was now time to light it up. Rob at Brickstuff has already written a helpful How-To guide when it comes to the placement of LED light strips and wires within the interior rooms of modular sets; Lighting Modular Sets – Tips and Tricks. Many of these tips can also be applied to pico lights. With those details covered, I am going to instead focus on exterior lighting aesthetics, and picking out the right fixtures for the job.
My lighting plan for Tudor Corner started by determining where the lighting might normally be placed in the real world. We can start with placing lights within the various LEGO lighting fixtures already positioned around the set.
View fullsize
View fullsize

View fullsize

View fullsize

I then looked for places where additional lights might be needed, like to light-up the clock maker’s sign at night. I also wanted to add a couple of interior ceiling lights on the upper floors that did not already have central light fixtures. In summary:
In the existing light fixtures of the set
In front of any signage to light it up
Inside each of the building rooms
Below are photos of how I added lights to those existing set fixtures, as well as created fixtures for lighting the signs and interior rooms.
View fullsize
View fullsize

View fullsize

View fullsize

View fullsize

View fullsize

In addition to these modern standard lighting fixtures, I could also envision this set being used as the cornerstone of a historical or steampunk city layout. With this in mind, I also looked into creating a gaslight lamp post and using one of Brickstuff’s orange flicker lights. These tend to be much dimmer than the standard lights, so that is something to keep in mind (you saw this with the boiler room photo, and will also see this comparison in the final photos).
View fullsize
View fullsize

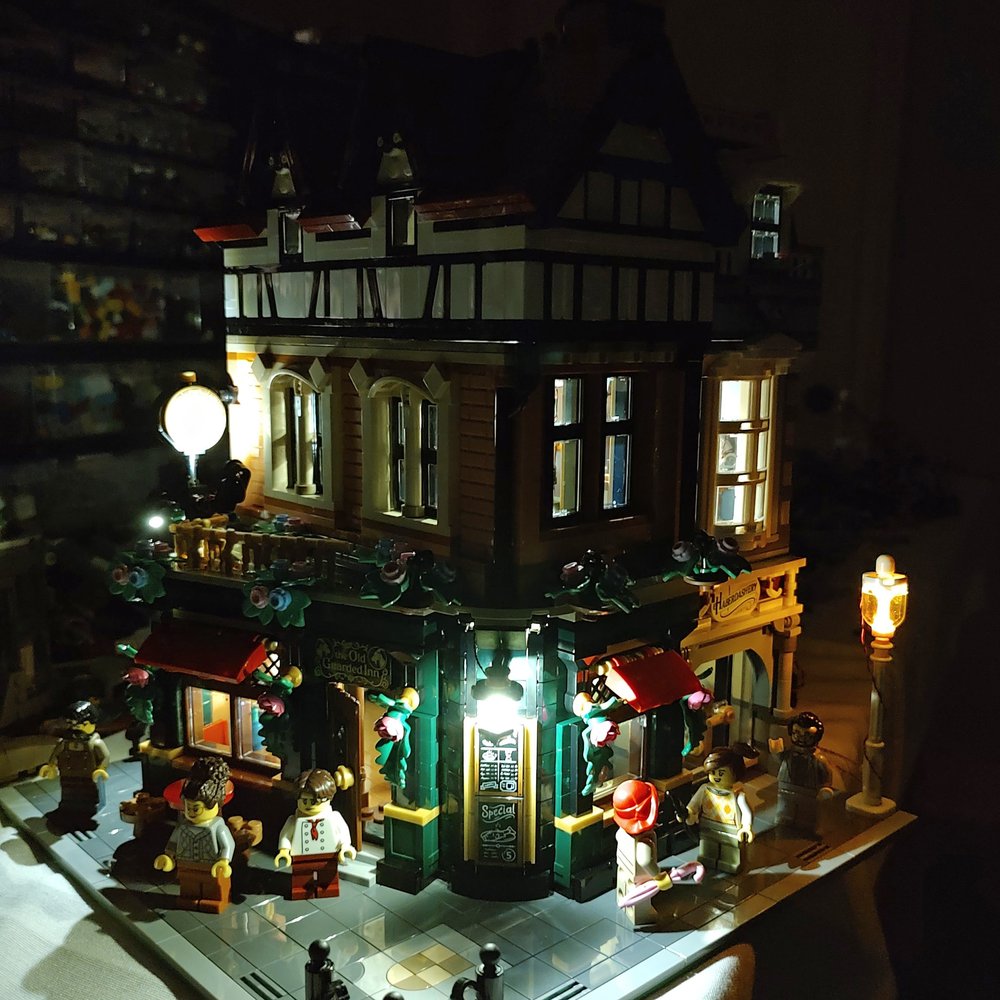
With the lighting fixtures modified and put into place, it was now time to see how it all looked in the dark. Below is a picture of my first attempt… It was a good start, but there were a couple things noticed in my test photo that could be improved.
The front door and sign of the Guarded Inn was not well lit using the existing fixture placement. I also noticed that the light I placed for the backside of the clock sign was not doing anything useful besides shining a light directly into our eyes. I had angled it down to light the back stairs, but I found even that was still a distraction.
To improve the overall lighting, I moved that errant light and placed it over above the Guarded Inn sign and door where it was needed. I also added one of Brickstuff’s prewired lamp posts at the left corner to see how it compared to the gaslight version. Here are photos of the final outcome:
View fullsize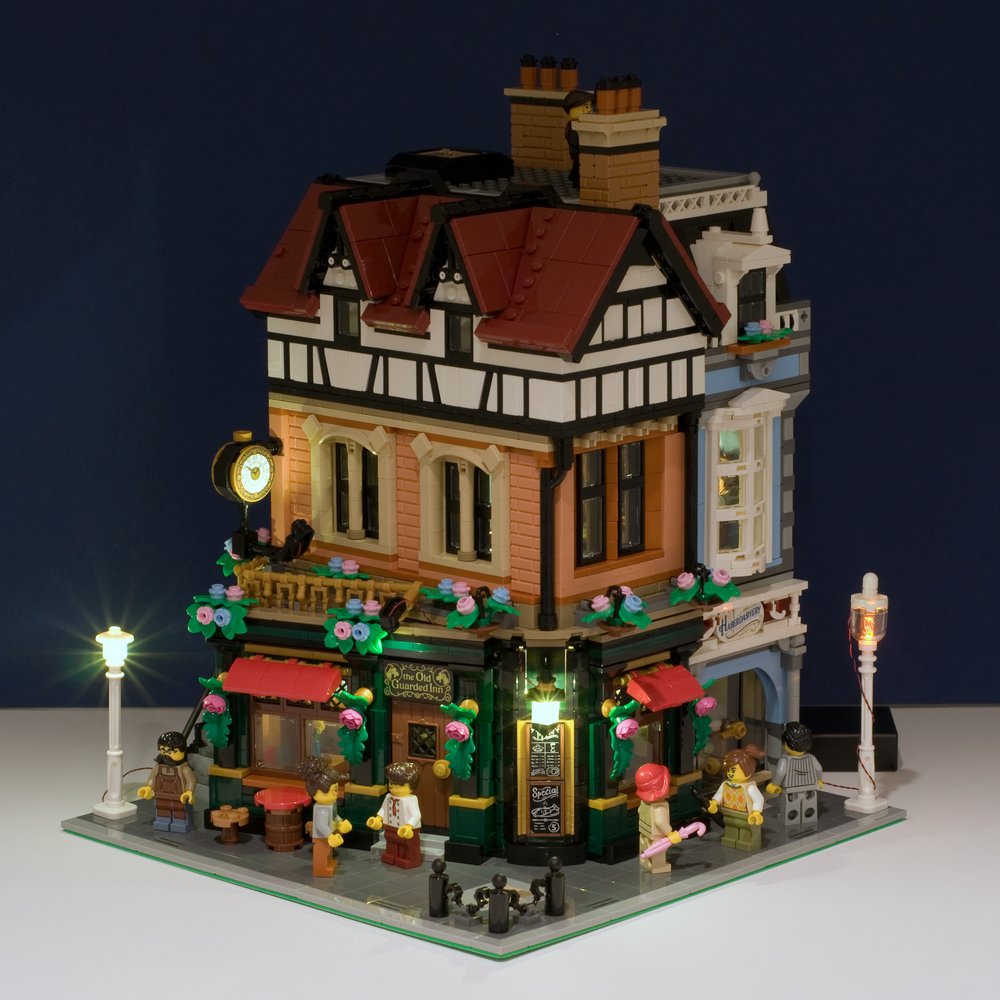
View fullsize

Final Words
I hope you enjoyed this spotlight on LEGO custom light fixtures and using them with the Tudor Corner set. In total, there were 10 pico lights used to light the Tudor Corner; 2 within ground floor, 2 within the clock shop, 1 within top-floor apartment, 3 on the building exterior, and 2 lamp posts. For those wanting to replicate this lighting (using two of the standard lamp posts), here is the inventory:
Pico LED Lights, Warm White with 30cm (12in) Cables (4-Pack) x2
12-Port Dual Size Expansion Board x1
AAA Battery Pack Power Bundle x1
As for the Tudor Corner, this set will certainly find itself at the top of most people’s wanted lists. The architectural style is a perfect fit in so many popular LEGO themes and genres (Modular City, Castle, Fantasy, Pirate, Historical, Steampunk, etc.). It’s also nice to see LEGO designers being able to flex for a change, and in the face of the seemingly endless modular building submissions that come through the Builder Design Program and LEGO Ideas. The kudos here are well deserved… now then, what’s next?
DISCLAIMER: The Tudor Corner and GWP Corner Kiosk sets were provided to BrickNerd by LEGO. Any opinions expressed in this article are those of the author.
Do you agree that LEGO’s new Tudor Corner set deserves the spotlight? Share your thoughts in the comments below.
Do you want to help BrickNerd continue publishing articles like this one? Become a top patron like Marc & Liz Puleo, Paige Mueller, Rob Klingberg from Brickstuff, John & Joshua Hanlon from Beyond the Brick, Megan Lum, Andy Price, Lukas Kurth from StoneWars, Wayne Tyler, LeAnna Taylor, Monica Innis, Dan Church, Roxanne Baxter, and Steven Laughlin to show your support, get early access, exclusive swag and more.

