How to Apply LEGO Stickers: Conquering the Dreaded Sticker Sheet
I hate stickers, you (probably) hate stickers, we all hate stickers! But stickers in LEGO sets are a fact of life. There have been many discussions about why they are used instead of printed parts, but it all comes down to providing more details while being scalable at production. This involves finding the balance of cost, quantity of elements in a set, and larger inventory control issues.
Since we can’t do anything about the use of stickers, I thought I would share a few pointers from my sticker application experience. And yes, you should apply the stickers! LEGO graphic designers really knock it out of the park to provide as good a sticker experience as possible… as long as you can stick ‘em on straight!
If you’ve ever had a problem with applying stickers to your LEGO pieces, this short illustrated guide is for you.
Step 1
Attach the part receiving the sticker to a larger element. For smaller parts, this makes it easier to handle and to get a good sticker application. Plus it gets your fingers out of the way from holding the piece. We want to remove any variables that could negatively affect sticker placement.

Step 2
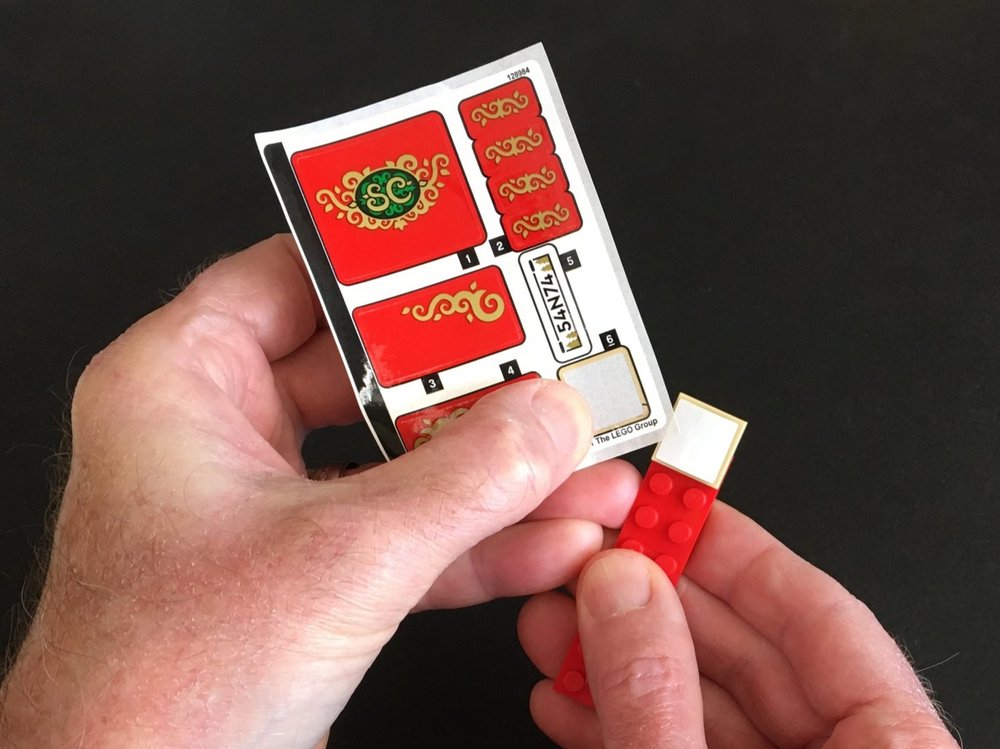
Peel the sticker as usual. With opaque stickers, that’s all it takes. Take care with the clear sticker sheets though to make sure you don’t leave your fingerprint forever on a stickered window, for example. You could use the edge of a brick separator or a butter knife if you really want to avoid fingerprints. (This sticker sheet is from the hard-to-find reindeer battle pack, 40499 Santa’s Sleigh.)

Step 3
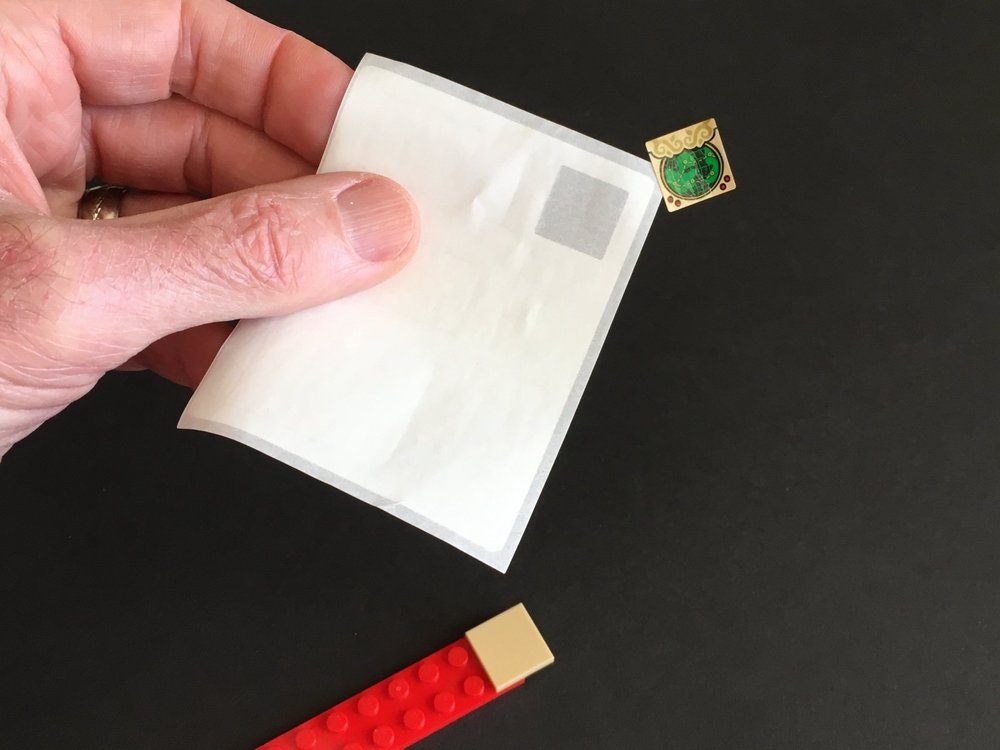
Attach the sticker to a corner on the back of the sticker sheet you just removed it from. This is the most important step. It makes it easier to handle and position the sticker—and to peel it off in case you need to reposition the sticker. A brick separator can also be used as a handy tool—or tweezers if you are really determined, but using the corner of the sticker sheet provides an additional benefit you’ll read about in Step 6 (spoilers!). The key is to get your fingers away from both the sticker and the piece to be stickered for better visibility and positioning.

Step 4
Flip the sticker over while still attached to the corner of the sheet and hold it upside down over the part you want to attach it to. This allows you to see how much edge distance there will be around the sticker, and it will make it easier to have the sticker properly centered. This is particularly useful on rounded or circular stickers where it is harder to judge the size of the edges before you place them.

Step 5
Flipping the sticker back over, carefully align the sticker with it centered and parallel to the part edges. I tend to place the sticker edge opposite from the temporary corner attachment on the part first. Most LEGO stickers are centered on the element, though there are occasionally a few small stickers that are placed on a large, blank wall panel or door that float a bit away from the edges. The key with those is to get the top of the sticker parallel to the top of the element, which you can visualize during the previous step.

Step 6
Gently tap the sticker in place with one finger (not pressing the whole sticker down) and see if you’re happy with the positioning. If not, peel the sticker off using the attached sheet corner that is still under the sticker a bit and start over. If you are happy, press the sticker down and hold it as you pull away the corner of the sticker sheet. Firmly press the sticker in place, and you’re done! For larger stickers like UCS plaques on Star Wars sets, you’ll want to press down from the center then smooth outwards to make sure there are no trapped air bubbles.
(Pro tip: We’ve heard rumors that applying a bit of Windex to the part makes the sticker able to be shifted after it is placed just in case the placement is not optimal the first time. Then you let it dry once it is in the best spot. I haven’t been able to confirm this myself, but we’ve heard of some LEGO Store employees using this technique for perfect sticker placement.)
So there you have it! A simple guide to applying LEGO stickers and taking some of the pain out of the process. There are no magical secrets here, just some tips and tricks that work well for me and hopefully will work for you.
Best of BrickNerd - Article originally published December 4, 2021.
What technique do you use to apply LEGO stickers? Leave your thoughts in the comments below.
Do you want to help BrickNerd continue publishing articles like this one? Become a top patron like Marc & Liz Puleo, Paige Mueller, Rob Klingberg from Brickstuff, John & Joshua Hanlon from Beyond the Brick, Megan Lum, Andy Price, Lukas Kurth from StoneWars, Wayne Tyler, LeAnna Taylor, Monica Innis, Dan Church, Roxanne Baxter, and Steven Laughlin to show your support, get early access, exclusive swag and more.

